Connect Supabase to flutter & perform CRUD Operation


Hello! In this blog post, I will walk you through how to set up supabase for your flutter app and after reading this written tutorial you would be able to connect Supabase with flutter and create, read, update, and delete data in your database. Supabase is an open-source firebase alternative. If you have heard about Supabase and know some of its functionalities you can skip to the 6th paragraph. Supabase is an open-source SQL database providing all the backend you will need to build your flutter app or any product. It has a lot of features but I will cover the major features in this blog.
Authentication, this feature gives you access to authenticate users with authentication methods like email & password, magic links(one-click-login), social login(Facebook, Twitter, and many more), and phone login.
Database, your data are stored in a Postgres database, and it’s in a table view form. Supabase has an SQL editor for creating databases. If you don't have any SQL experience you can create a database by adding a table and specifying the name of the column and its row elements.
Realtime, this feature is like socket io or a Stream in flutter, you get real-time updates when there's a change in your database. This feature is useful when you are building a chat app or multi-player games.
Storage, this feature also provides you with a storage bucket for storing files.
Click on this link to read more about Supabase https://supabase.com/docs
To use Supabase as a database for your flutter you need to create a Supabase account. Supabase supports two authentication methods (Github & Email and Password)
SignUp via this https://app.supabase.com/sign-up
Once you are done with the signUp a verification link would be sent to your email, click and verify your account.
Congratulations you have signed up for Supabase.
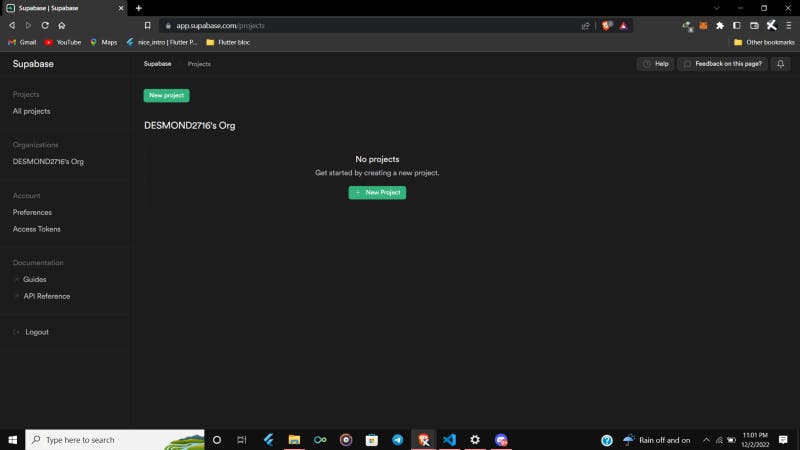
You should see a similar page in the picture above when you log into your account.
Click on the New project to create your database

Provide your project name, database Password, choose a Region close to your continent. Select the free plan since our database is just a test mode. Click on Create new project to complete. The project would take like 40 seconds to set your database up.
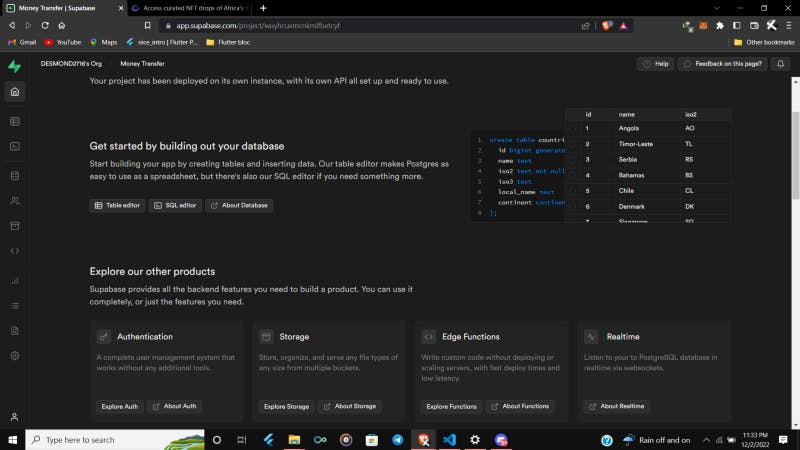
You have successfully created your project when you see this on the homepage.
You have successfully created the project, let’s create the table for our data. Our table will have three(3) columns (id, name, and age).
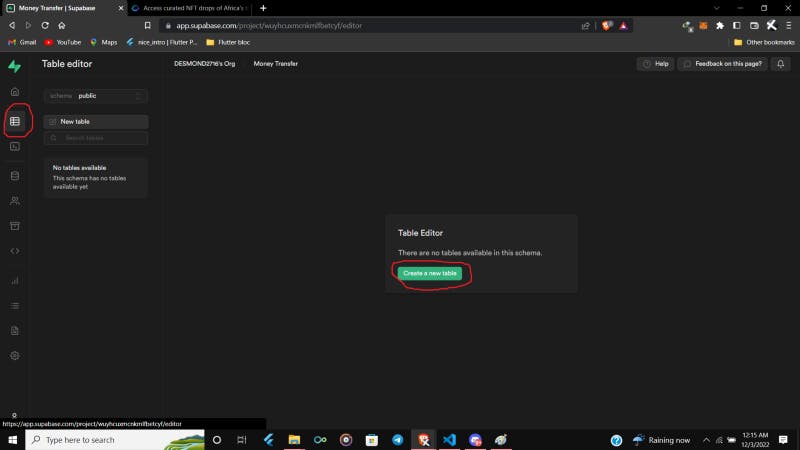
Click on the red circled button to open the table editor
Click on Create a new table to define the database schema.
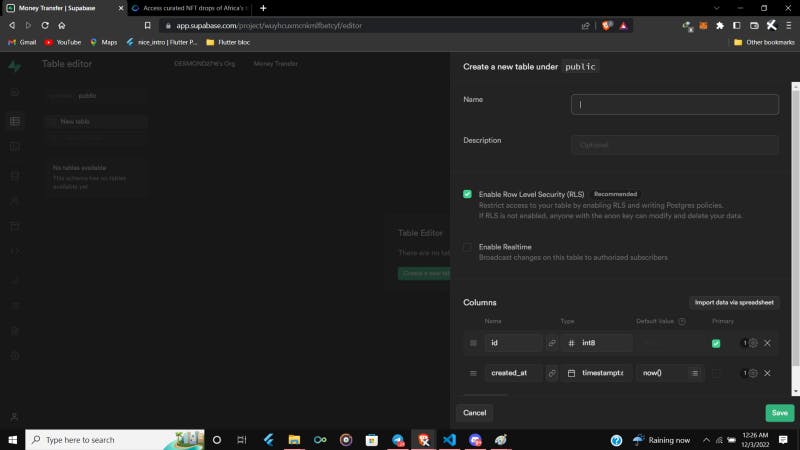
Enter the name and description in the text fields
When creating a column in the table you have to specify the name, and data type the column should accept.
Some of the data types are integers, double, text, and JSON. Since our table has three schemas, we will have 3 data texts (UUID), texts(name), and int(age). Click on the cancel icon to delete the sample columns. Click on add column button to add a schema, first, we will add the id, Name = id, and Type = UUID. We make the id primary so that we could access the data in a row by the id. The name will also be Name= name and Type = Text. Lastly, the age will take age as Name and int as Type.
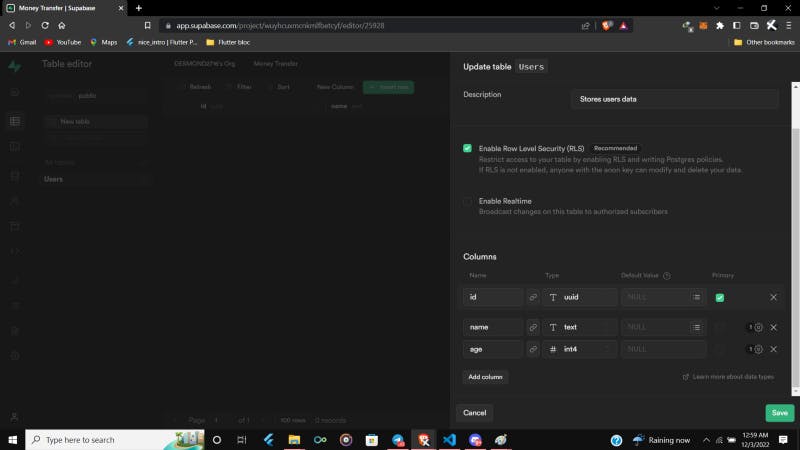
If your column looks like this then you have successfully created the table. Click on Save and see the magic that would happen.
You could see the table in the picture above. We will send data from our flutter app to the database. Retrieve, update and delete the data in the database as well.
Create a new flutter project and add the supabase_flutter package https://pub.dev/packages/supabase_flutter to your pubspec.yaml file under the dependencies.
name: supabaseTest
description: SupabaseTest

publish_to: "none"

version: 1.0.0+1

environment:
sdk: ">=2.18.5 <3.0.0"

dependencies:
cupertino_icons: ^1.0.2
flutter:
sdk: flutter
#supabase package
supabase_flutter: ^1.0.0

dev_dependencies:

flutter_lints: ^2.0.0
flutter_test:
sdk: flutter
flutter:
uses-material-design: true
We will initialize Supabase in the main.dart. We will convert the main method to an asynchronous function so that we can await to initialize the Supabase.
We have to add our database URL and annonKey to the Supabse.initialize() function. Go to your Supabase dashboard and click on the settings icon in the list of side buttons \>> Click on API, under the API Settings copy the project Url and annonKey. Check the picture below for more details.

import 'package:flutter/material.dart';
import 'package:supabase_flutter/supabase_flutter.dart';

import 'home.dart';

void main() async {
WidgetsFlutterBinding.ensureInitialized();
await Supabase.initialize(
url:paste your database url here ,
anonKey: paste your annon key here,
);
runApp(const MyApp());
}
You have initialized Supabase in your flutter app🎊. Let’s dive into the create, read, update and delete.
Before we start, we have to disable RLC(Row Level Security) in our Users Table. Disabling the RLC will grant us access to perform CRUD operations. The picture below will guide you on how to do that. Read more about RLC at https://supabase.com/docs/learn/auth-deep-dive/auth-row-level-security

Let’s create the CRUD methods.
CREATE OR INSERT
final supabaseClient = SupabaseClient(database url,AnnonKey);

void create() async {
// Create a map, let the key of the map be the name of the columns and value
// be the user input
Map userData = {
//Uuuid().v1() generate uid for each data we add
'id': const Uuid().v1(),
// name is key and the _nameController.text.trim() is the value from the user
'name': _nameController.text.trim(),
'age': _ageController.text.trim(),
};
// Always pass the name of the table in the *from* function. Our table name is
// Users so we passed the Users in the from function.
await supabaseClient.from('Users').insert(userData);
}
READ OR RETRIEVE
Future read() async {
// select will return all the data in the Users Table
final userData = await supabaseClient.from('Users').select();
return userData;
}
UPDATE OR MODIFY
void update() async {
Map updateMap = {
'name': _nameController.text.trim(),
};

await supabaseClient
.from('Users')
.update(updateMap)
// specify the id of the data and select the column to be updated
.eq('id', 'c9485200-75af-11ed-84c8-21e139cba221');
}
DELETE OR REMOVE
void delete() async {
await supabaseClient.from('Users').delete().eq('id', 'c9485200-75af-11ed-84c8-21e139cba221');
}
Congratulations on reaching this part. I hope you can use these methods to perform CRUD operations in your app. Full source code and a GitHub repository will also be provided.
Main.dart code
import 'package:flutter/material.dart';
import 'package:supabase_flutter/supabase_flutter.dart';

import 'package:supatest/home.dart';

const databaseUrl = 'database url';
const databaseAnnonKey = 'database annon key';
void main() async {
WidgetsFlutterBinding.ensureInitialized();
await Supabase.initialize(
url:databaseUrl ,
anonKey: databaseAnnonKey,);
runApp(const MyApp());
}

class MyApp extends StatelessWidget {
const MyApp({super.key});
@override
Widget build(BuildContext context) {
return MaterialApp(
title: 'Supabase',
theme: ThemeData(
primarySwatch: Colors.blue,
),
home:const HomePage(),
);
}
}

Home.dart code

import 'package:flutter/cupertino.dart';
import 'package:flutter/material.dart';
import 'package:supabase_flutter/supabase_flutter.dart';
import 'package:supatest/user_model.dart';
import 'package:uuid/uuid.dart';

import 'main.dart';

class HomePage extends StatefulWidget {
const HomePage({super.key});

@override
State createState() => _HomePageState();
}

final _nameController = TextEditingController();
final _ageController = TextEditingController();
final _idController = TextEditingController();
final supabaseClient = SupabaseClient(databaseUrl, databaseAnnonKey);

class _HomePageState extends State {
void create() async {
Map userData = {
'id': const Uuid().v1(),
'name': _nameController.text.trim(),
'age': _ageController.text.trim(),
};
await supabaseClient.from('Users').insert(userData);
}

Future read() async {
final userData = await supabaseClient.from('Users').select();
return userData;
}

void update() async {
Map updateMap = {
'name': _nameController.text.trim(),
};
await supabaseClient
.from('Users')
.update(updateMap)
.eq('id', _idController.text.trim());
}

void delete() async {
await supabaseClient
.from('Users')
.delete()
.eq('id', _idController.text.trim());
}

@override
Widget build(BuildContext context) {
return Material(
child: CupertinoPageScaffold(
navigationBar: CupertinoNavigationBar(
middle: Text(
'SupaBase CRUD',
style: TextStyle(color: Colors.green),
),
leading: IconButton(
onPressed: () => setState(() {}),
icon: const Icon(
Icons.refresh,
color: Colors.green,
)),
backgroundColor: Colors.black,
),
child: Center(
child: Column(
children: [
const SizedBox(height: 10),
Container(
width: 200,
height: 30,
decoration: BoxDecoration(
border: Border.all(
color: Colors.green,
style: BorderStyle.solid,
strokeAlign: StrokeAlign.outside)),
child: TextFormField(
controller: _nameController,
decoration: const InputDecoration(
hintText: 'Name',
border: InputBorder.none,
),
),
),
const SizedBox(height: 20),
Container(
width: 200,
height: 30,
decoration: BoxDecoration(
border: Border.all(
color: Colors.green,
style: BorderStyle.solid,
strokeAlign: StrokeAlign.outside)),
child: TextFormField(
controller: _ageController,
decoration: const InputDecoration(
hintText: 'Age',
border: InputBorder.none,
),
),
),
const SizedBox(height: 20),
Container(
width: 200,
height: 30,
decoration: BoxDecoration(
border: Border.all(
color: Colors.green,
style: BorderStyle.solid,
strokeAlign: StrokeAlign.outside)),
child: TextFormField(
controller: _idController,
decoration: const InputDecoration(
hintText: 'Id of data to be deleted',
border: InputBorder.none,
),
),
),
const SizedBox(height: 20),
CupertinoButton(
onPressed: create,
color: Colors.green,
pressedOpacity: 0.3,
child: const Text('Create'),
),
const SizedBox(height: 20),
CupertinoButton(
onPressed: read,
color: Colors.blue,
pressedOpacity: 0.3,
child: const Text('Read'),
),
const SizedBox(height: 20),
CupertinoButton(
onPressed: update,
color: Colors.brown,
pressedOpacity: 0.3,
child: const Text('Update'),
),
const SizedBox(height: 20),
CupertinoButton(
onPressed: delete,
color: Colors.red,
pressedOpacity: 0.3,
child: const Text('Delete'),
),
const SizedBox(height: 20),
Expanded(
child: FutureBuilder(
future: read(),
builder: (BuildContext context, AsyncSnapshot snapshot) {
if (snapshot.connectionState == ConnectionState.waiting) {
return const Center(
child: CircularProgressIndicator(color: Colors.blue),
);
}
if (snapshot.data != null) {
return ListView.builder(
shrinkWrap: true,
scrollDirection: Axis.vertical,
itemCount: snapshot.data.length,
itemBuilder: (context, index) {
var data = UserModel.fromJson(snapshot.data[index]);

return ListTile(
leading: Text(data.age),
title: Text(data.name),
);
});
} else {
return const Center(
child: Text('No data'),);}},))],),),));
}
}

UserModel.dart code

class UserModel {
final String id;
final String name;
final String age;

UserModel({
required this.id,
required this.name,
required this.age,
});

factory UserModel.fromJson(Map<String, dynamic> json) {
return UserModel(
id: json['id'],
name: json['name'],
age: json['age'].toString(),
);
}
}
View the full source code here https://github.com/DESMOND2716/Supabase-CRUD-
You contact me on Twitter https://twitter.com/27_wednesday
Click on this link to watch the video on how the CRUD operation works